Get free printable alphabet flash cards to teach upper and lower case letters to your child!
Today I’m sharing the easy to print double sided flash cards I made my four year old – I highly recommend printing two sets of these cards to play a variety of games.
Keep reading to learn:
- The benefits of using flash cards for early literacy
- Creative ways to use this set of flash cards
- Fun games to play with these flash cards
- More fun ways to help children learn their upper and lower case letters
- How to print and laminate your cards at home for longterm use!
Disclosure: This post contains affiliate links and I could earn a commission if you make a purchase using them. This comes at no additional cost to you and all opinions expressed are my own.
Benefits of Using Alphabet Flash Cards
Learning the alphabet and being able to recognize letters in their upper and lowercase forms opens the door to early reading skills.
Children may begin recognizing letters as early as two years old and by the age of three or four, some are already engaging in early phonics activities by understanding the sounds they make too (“a” for apple, “b” for ball, etc.).
Later on, they’ll begin to see how these letters and their sounds come together to create whole simple words (as in “s”-“i”-“t” says sit).
This is where being able to recognize letters in both their upper and lowercase forms becomes essential and I’ve found flash cards and games to be extremely helpful in teaching this.
Instead of just seeing letters in books or on a piece of paper, alphabet flashcards give children an opportunity to use their sense of touch as they sort and pair matching letters.
They can be used for independent review, to play games with a parent, or even in group settings and will increase a child’s confidence as he or she comes to match more and more pairs over time.
Games & Other Creative Ways to Use Alphabet Flash Cards
Real learning and fun happens when you move past drills! Print two sets of these double sided alphabet cards and try these fun activities with your child:
- Letter Match (Two card decks) – Lay out both complete card sets with either the uppercase or lowercase letters facing up. Have the child match pairs of the same letter, for instance two uppercase A’s. Ask the child to say the letter’s name once they match two that look the same. Once your child is able to recognize all upper or lower case letters, flip the decks to the opposite side and have him or her match the other sets (i.e. two lower case a’s).
- Uppercase & lowercase match (Two card decks) – Lay out one set of cards with the uppercase letters facing up. Lay the second set of cards with the lowercase letters facing up. Ask your child to match each uppercase letter to its lowercase letter then say the letter’s name out loud. If he or she is able to, you can also ask your child to say the sound that the letter makes or teach them the sound once they’re able to recognize the letters’ names.
- Alphabet scavenger hunt (One card deck) – Hold up a letter card and ask your child to find something in the room that starts with that letter (it could be a toy, a book with that letter on it, etc.) – this set of toys is really easy for kids to spot and is color coordinated with the included treasure chest game.
- Alphabet letters hunt (Two card decks) – Hang onto one full deck of letter cards. Then, place the other cards around your home. You could tape a couple to the wall, place them in stuffed animals’ laps, in dollhouses, etc. Tell your child that you’re going on a letter hunt today and show them the uppercase or lowercase version of the letter and have them find the opposite hidden one in your home.
- Phonics practice – Say the letter sound and have your child repeat it.
- Letter sequencing (One card deck) – Ask your child to put the cards in alphabetical order – once with uppercase letters, once with lowercase letters.
- Bingo – (One card deck) Call out letter names and have your child collect the cards as you did. You could even print off alphabet bingo cards to create another game with your card deck.
- Spelling simple words (One or more card decks) – Start with your child’s name and moved onto short simple words like dig, sit, and, cat.
Explore more homeschooling ideas for families that love to learn:
- How to Set Up the Perfect Homeschool Room (Whether You Have a Big or Tiny Home!)
- 35+ Must-Have Morning Basket Ideas to Start Your Day Peace and Purpose
- Budget-Friendly + Fun Homeschool Field Trip Ideas to Discover This School Year
Best Alphabet Games to Pair with Flash Cards
Make learning fun and easy by including a couple of these games into your homeschool day or classroom:
- Alphabet Mystery Box – This adorable game caters to the fact that children love surprises (just think about how many YouTube channels are devoted to this, haha). Kids place their hand into the mystery box to pull out an object and then place it on the corresponding alphabet letter board. So, for example, the plastic duck your son pulls out of the box is placed on the matching D on the game board. I love that the board is double sided too with one side being uppercase and the other side having lowercase letters.
- Felt Letter Coconut Tree – I still remember being read Chicka Chicka Boom Boom as a child and both of my girls love the story just as much today! This adorable activity includes upper and lowercase letters that children place on the felt coconut tree. You could easily use it as part of your read aloud time and have kids place the letters onto the tree at that part of the story. It can help kids who are resistant to being read to (I have one of those) keep their hands busy so they can focus during story time too.
- Unlockable Treasure Chests – This set is amazing. Children match lowercase letter keys to uppercase letter treasure chests – all of the locks on the chests are different so your child needs to use the right key in order to actually open it. Once they have the right match, the treasure chest can be opened to discover a cute color coordinated prize! This helps both the child and adult speed up and actually enjoy clean up time as well, haha.
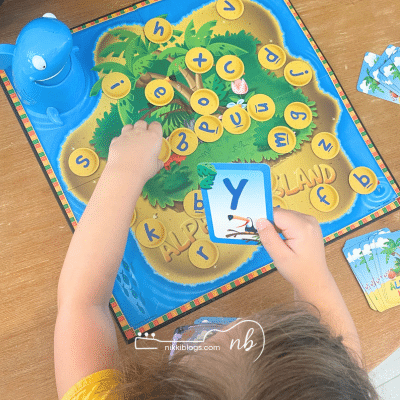
- Alphabet Island – Both of my daughters love this game. Each player is handed a deck of cards at the start of the game and when it’s your turn, you flip the card over to reveal which lowercase letter coin you need to find. For instance, an uppercase A card requires finding a lowercase a coin. There’s a few shark cards hidden throughout though and if you draw the shark, you have to feed him one of your coins! My girls can’t get enough of the shark, haha. For additional phonics practice, I have them same the sound the letter makes when they collect their coins.
You can also check out my full guide to alphabet activities for preschool aged children for more ideas.
How to Laminate Flash Cards
To preserve your flashcards, invest in a laminator like this one – I’ve been using mine at home for about 3 years now and absolutely love this thing.
We’ve done everything from printing out homeschool curriculum to making gifts like homemade bookmarks, flashcards, and more.
You could even turn the free printable preschool pages I’ve created (find them at the bottom of this post) into reusable workbooks for your preschool and kindergarten students!
But back to flashcards.
To laminate flashcards, you’ll want two things: a laminator (this is the one I have) and laminating sheets (I recommend this size as the sheets are thicker and more resilient to wear and tear – Amazon basics work just as well as the name brand ones. I’ve used both and found no difference in the quality but a big difference in the price tag).
Before laminating, turn on your laminator to let it heat up and be sure to select the right laminating sheet thickness (we use 5mm sheets and select this mode).
As your laminator is warming up, cut out your cards exactly how you want them to appear when they’re ready. They need to be separated before laminating otherwise the individual seals for each card will not form. Have a look at the photo below.
Once cut, place each card into the laminating sheet starting at the closed end (where the top meets the bottom of the page). Be sure to line them up so each card has enough space for you to cut them afterwards.
When you’re ready, line up the laminating sheet with the line on your laminator to make sure it comes out straight (you don’t want to bend your pages and wreck your cards now).
It’ll take about 30 seconds and you’ll want to be careful about handling the back end since it’ll be quite hot.
After it comes out, run it through a second time to make sure it’s evenly pressed.
I use kitchen scissors like these to cut my cards but a paper cutter would definitely make the edges more even than I’m able to do free handing it.
Once that’s done, put through your next sheet of flashcards to be laminated and wait for your first sheet to cool down before your start cutting it.
They’ll come out looking like this – I maximize my laminating sheet capacity by placing the cards this way because it gets one extra card in there (facing them all the same direction only does 9 instead of 10 at once and then you’re just throwing away extra parts of the sheet that didn’t need to be wasted). You can see the ones I cut out while waiting for the sheet in my hand to finish being sealed.

Free Printable Alphabet Flash Cards
To download these flash cards, click on the text or image below.
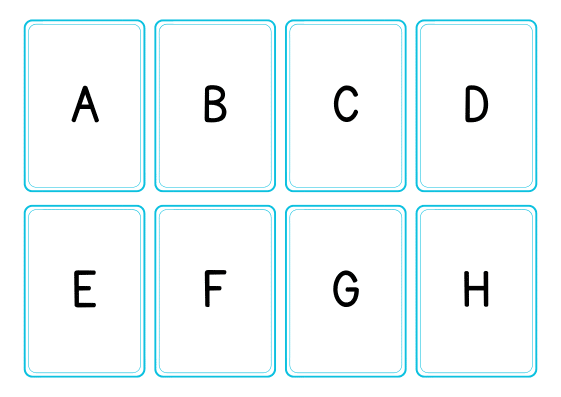
Your free printable alphabet flash cards will automatically download both upper and lower case letter sets.
You’ll notice that the lowercase set appears upside down but I designed them like this to allow for double sided printing after spending way too many hours cutting and pasting flashcards together one afternoon!
Be sure to select double sided printing on your printer (this is a fantastic printer that’s actually affordable for homeschool families who print off a lot of learning materials at home) before printing – I’ve noticed that sometime Adobe will only print single sided even when double sided is selected and you may have to go select and then unselect it again to get it to actually print double sided!
I formatted the Alphabet cards like this way to save half the work load and they actually look really great after being laminated. The color is more vibrant too.

If you’d prefer single sided cards in only uppercase or lowercase formats, you can download these sets of flash cards instead.

When you’re ready to start basics phonics with your child, be sure to download, print, and laminate, our free phonics flash card set next.
How to Use Blank Cards
When you get to the last page, you’ll notice that there are six blank cards for you to use as you see fit – I recommend using a dark pencil (these are great for kids who teaching kids who love to “carve” when they write to go easy on the pencil too) or pencil crayon to write on the blank cards so the color doesn’t show through on the other side.
I’d suggest maybe another couple of B’s and D’s to start as young children often confuse lower case “b” and “d” with one another.
You can use a picture of a baseball bat and a baseball to teach that the bat always goes first in the letter “b”. The donut always comes first in the letter “d”.
For older kids, you could also show them to make a “b” with their left hand by rolling their fingers inwards toward their palm and thumb pointed straight up to the ceiling and a “d” with their right hand by doing the same on that side. When spread apart, the left hand represents “b”, the gap between hands can represent “e”, and the right symbolizes “d” to spell bed.
Tips for Success with Alphabet Flash Cards
To keep your child excited about using flash cards, consider the following:
- Keep practice sessions short and fun – 5 to 10 minutes a day of drills is more than enough time for kids this age. Playing games like letter hunt is much more fun! You could even hide the letters on items that start with that letter.
- Introduce just a few letters at a time – don’t expect your three year old to learn the entire deck in one day. Instead, consider introducing three letters at a time and pair it with a fun activity like alphabet songs and/or board games.
- Celebrate small wins with lots of encouragement – as adults, we’ve known how to read for so long that we’ve forgotten what it feels like to learn this brand new concept. But like any new hobby or skill, it takes time to form new abilities. Cheer for your child and make learning fun above all else.
- Mix things up with different games – some children love to do things “again” and “again”. Others will get tired of playing the same games and may want to try something new. Consider doing bingo on Mondays, matching activities on Tuesdays, and letter hunts on Wednesdays to keep it fresh – create a fun schedule that you and your child actually look forward to doing each day.
- Follow your child’s pace and learning style – don’t push your child if he or she isn’t ready to progress and choose activities that fit their interests. I quickly learned this lesson after making this mistake with my own child.
While my oldest daughter mastered phonics by the time she was three years old and loved being read to probably since the day she was born, the youngest didn’t start to take an interest in books and preferred alphabet activities early on.
She’d often get bored and irritable as I read to her and her sister and this left me frustrated as her mom too. I realized that she craved imaginary play more than anything and that singing songs, playing games, and using toys as part of her learning were how she’d come to understand phonics.
We spent a lot of hours playing ice cream shop with this set of matching upper and lowercase letters! I can now give her orders using the flash cards I created too – it’s a whole alphabetical restaurant experience, haha.

More Free Printable Activities to Use with Alphabet Flashcards
Alphabet flash cards are one of the simplest yet most powerful tools you can use to teach children the alphabet, letter recognition, and even basic phonics – you can even use them to practice spelling children’s names when you print off a couple of decks.
For more free printable preschool and kindergarten resources in your homeschool or classroom, be sure to check out the posts below.
Happy learning, friend!
– Nikki
Get More Free Printable Toddler, Preschool, and Kindergarten Activities: